Разделы

Март 2024
Пн Вт Ср Чт Пт Сб Вс
 123
45678910
11121314151617
18192021222324
25262728293031

iPad 2 Как навигационная система.

Берем iPad 2 (любой модификации) в них нет GPS приемника, но может и есть, но этого никто не знает, и даже не может объяснить как там вся эта навигация работает. Проверенно – навигация работает только в городе. Можно поставить Новител или Яндекс карты – они прекрасно работают. В интернете существует отличная програма под названием Bit Map она отлично кушает и показывает карты из под OziExplorer и даже умеет двигаться по ним, но только в городе.

Все было бы просто если можно было бы купить Bluetooth GPS приемник и спокойно принимать координаты в формате NMEA через него, но тут тоже грабли. Оказывается в мире всего 1-2 таких приемника которые умеет общаться с iPad и то в Москве они не продаются.

После рысканья в Интернете наткнулся на то что есть такое понятие как GPS/Wi-Fi/TCP/IP/NMEA для iPad. Оказалось все очень просто. Есть устройства со встроенным или не встроенным GPS приемником которые работают как TCP/IP сервер, с возможностью подключение к ним через Wi-Fi и при подключения к ним через TCP/IP порт – iPad просто получает текущие координаты в NMEA формате. Ура. но не совсем. Оказывается что программ которые умеет читать с TCP/IP порта NMEA данные практически нет. Есть дорогая программа и то для водного транспорта.
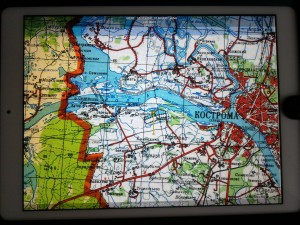
 

Вот так выглядит карта на iPad в программе Bit Map. Но как заставить данную программу показывать хотя бы нужную карту местности и по возможности Ваш трек. Оказывается она умеет загружать через HTTP самый обыкновенный файл KML с точками или треком и отображать его на карте. Конечно понятно что это не совсем On-Line мониторинг вашего передвижения, но это шанс не заблудиться. Вы спросите почему бы не в ручную загрузить карту и смотреть на нее, это не удобно в том случаи когда карт у вас очень много и искать конкретно данную карту затруднительно. Вот что пока мне удалось разузнать про эту чудесную штуку iPad 2.


А теперь напишу то что я придумал, и это работает, не уверен что это правильно. Буду благодарен если подскажите что можно сделать чтобы из iPad 2 сделать полноценную систему навигации.

Для того чтобы считывать данные нужен HTTP сервер, чтобы к нему подключиться нужен Wi-Fi точка доступа. Идея заключается в следующем: Берем обыкновенный самый дешевый Wi-Fi маршрутизатор к нему  подключаем микроконтроллер который имеет Ethernet, HTTP сервер, а также GPS приемник. Осталось все запрограммировать.  В итоге получим GPS Track Logger c возможностью считывания ваших текущих и пройденных координат через HTTP протокол.


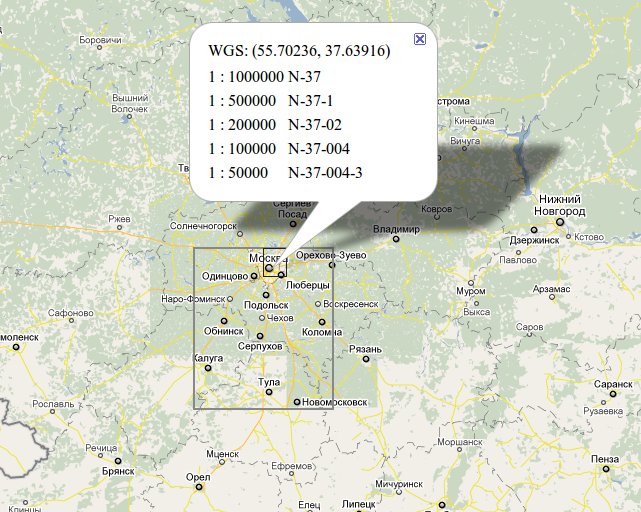
Как определить, какие конкретно карты нужны.

Как определить, какие конкретно карты нужны для определенной местности.

http://gpsmapsearch.com/osm/nom.htm

http://gpsmapsearch.com/osm/nom.htm

GPS EXIF Пример

[xmlgm ngg_gallery=19]

Importing Waypoints from a Text File (OZI)

Источник: http://www.rus-roads.ru/gps/help_ozi/index.html

Importing Waypoints from a Text File

see also Exporting Waypoints to a Text File

To Export waypoints simply select the Export Waypoints to Text File on the Save menu.

wImportWp.gif (3105 bytes)

The datum used for importing (the datum used for the positions in the file) can be specified, if the datum is in the file in one of OziExplorers standard datums then it will default to this.

Before manually creating your own text files for importing you should create some waypoints in OziExplorer and Export these to a file in the desired format and use this file as a template.

File Format

The format is the same as the Waypoint text files from Waypoint+ but with some extensions.

However these files are not meant for import by Waypoint+ there are extra options on the Garmin menu for importing and exporting Waypoint+ files. The reason Waypoint+ cannot use these files is the datum names are different, when Waypoint+ finds a datum name it does not recognize it gives an error.

RECORD TYPES

Waypoint+ types

The 1st field is signifies that it is a Waypoint record, the characters Waypoint or WP can be used.

Each keyword is followed by a designator that describes what kind of storage is used with latitude and longitude. DM and DMS are stored in as single packed floating point number.

D=decimal degrees; ddd.dddddddd (34.064531922)

DM=degrees minutes; ddd.mmmmmmm = ddd mm.mmmmmmm (34.06548 = 34 6.548′)

DMS=degrees minutes seconds; ddd.mmsssssss = ddd mm ss.sssss (34.06453 = 34 6′ 4.53″)

UTM=zone,easting,northing

Extended Types

To make it easier for text data entry extra extended types have been added.

DMX=degrees minutes; the degrees and minutes are entered into their own fields separated by commas.

DMSX=degrees minutes seconds; the degrees, minutes are entered into their own field separated by commas.

BNG=zone,easting,northing (British National Grid)

IG=zone,easting,northing (Irish Grid)

NZG=easting,northing (New Zealand Grid)

SG=easting,northing (Swedish Grid)

SUI=easting, northing (Swiss grid)

WP, waypoint name, latitude, longitude, date , time , waypoint description.

Example:

Standard Waypoint+ types

WP, waypoint name, latitude, longitude, date , time , waypoint description.

The date must be in month/day/year format or left out and the current date will be used.

Examples:

WP,D,WPNAME,34.064531922,-117.2959507350,11/23/1995,19:29:00,Description

WP,DM,WPNAME,34.06548,-117.80632,11/23/1995,19:29:00,Description

WP,DMS,WPNAME,34.06453,-117.29595,11/23/1995,19:29:00,Description

WP,UTM,WPNAME,56J,445946,7063980,11/23/1995,19:29:00,Description

Extended Types (preferred for manual data entry)

WP, waypoint name, latitude(multiple fields), longitude(multiple fields), date , time , waypoint description.

Examples:

WP,DMX,WPNAME,34,6.548,-117,80.632,11/23/1995,19:29:00,Description,Symbol

WP,DMSX,WPNAME,34,6,4.53,-117,29,5.95,11/23/1995,19:29:00,Description,Symbol

No fields are case sensitive, lowercase or mixed case can be used in any field.

The symbol is coded as A=0 B=1 C=2 etc

The Garmin GPS waypoint display format is also added to the end of the line after the symbol, however it is not guaranteed that this will be continued in future. N = Name  S = Symbol  C = Comment

Datum

The datum can be specified in the file.

The Datum Record Type

DATUM,WGS 84

The datum is optional, if it is not there you will be requested for the datum.

The datum must be a recognized OziExplorer datum name, these can be viewed on the datum list.

When importing the file the software will allow you to modify the datum.

Exporting Waypoints to a Text File (OZI)

Источник: http://www.rus-roads.ru/gps/help_ozi/index.html

Exporting Waypoints to a Text File

see also Importing Waypoints from a Text File

To Export waypoints simply select the Export Waypoints to Text File on the Save menu.

wExportWp.gif (2578 bytes)

The datum used for exporting can be selected and will default to the datum used for the current map.

NOTE : When exporting to a Waypoint+ text file the datum cannot be altered from WGS 84. Also when importing a Waypoint+ text file the file must have been written from Waypoint+ using the WGS84 datum, OziExplorer does NOT try to use different datums when importing Waypoint+ text files.

The Record format can be selected, I would suggest you use the DMX format for manual editing, this will allow you to enter the Waypoints in degrees and minutes.

File Format

See Importing Waypoints from a Text File for a full description of the formats.

GPSBabel converts waypoints, tracks, and routes…

Очень хорошая программа для конвертирования треков, точек, маршрутов из одного формата в другой. Например чтобы из формата OziExplorer получить формат KML для Google maps.

gpsb1

gpsb2

Или можно воспользоваться вот этим интерфейсом.

http://www.pajero4x4.ru/gps/

Как привязать карту для OziExplorer

Ссылки на тему:

Привязка по координатам:

ozicalib1

Открываем файл с картой для которого хотим сделать привязку для OziExplorer-a

ozicalib2

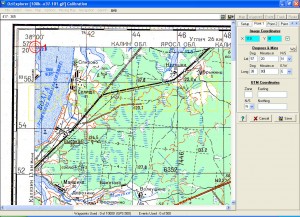
Вот то что мы видим после открытия файла

ozicalib3

Выбираем закладку Point 1, меняем W на E (это нужно делать для каждой нашей точки). Ставим первую точку на пересечении координат в верхнем левом углу.

ozicalib4

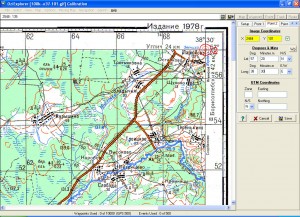
Вводим координаты первой точки, переходим к следующей точке.

ozicalib5

Вводим координаты второй точки и так далее все 4 точки, для всех четырех углов на карте.

ozicalib6

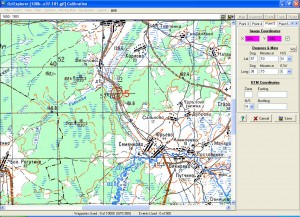
Очень часто существует и 5-я точка в центре карты ее мы тоже вводим.  После этого мы сохраняем привязку в файл.  И можем пользоваться данной картой в OziExplorer.


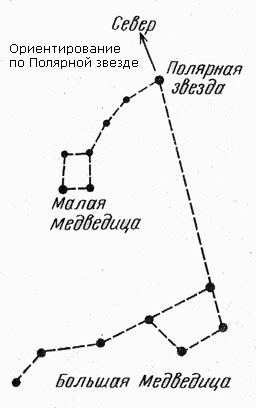
Ориентирование по полярной звезде

sever